9 R Projects
In previous chapters of this book, we learned how to use R scripts and [R markdown] files to create, modify, save, and share our R code and results. However, in most real-world projects we will actually create multiple different R scripts and/or R markdown files. Further, we will often have other files (e.g., images or data) that we want to store alongside our R code files. Over time, keeping up with all of these files can become cumbersome. R projects are a great tool for helping us organize and manage collections of files. Another really important advantage to organizing our files into R projects is that they allow us to use relative file paths instead of absolute file paths, which we will discuss in detail later.
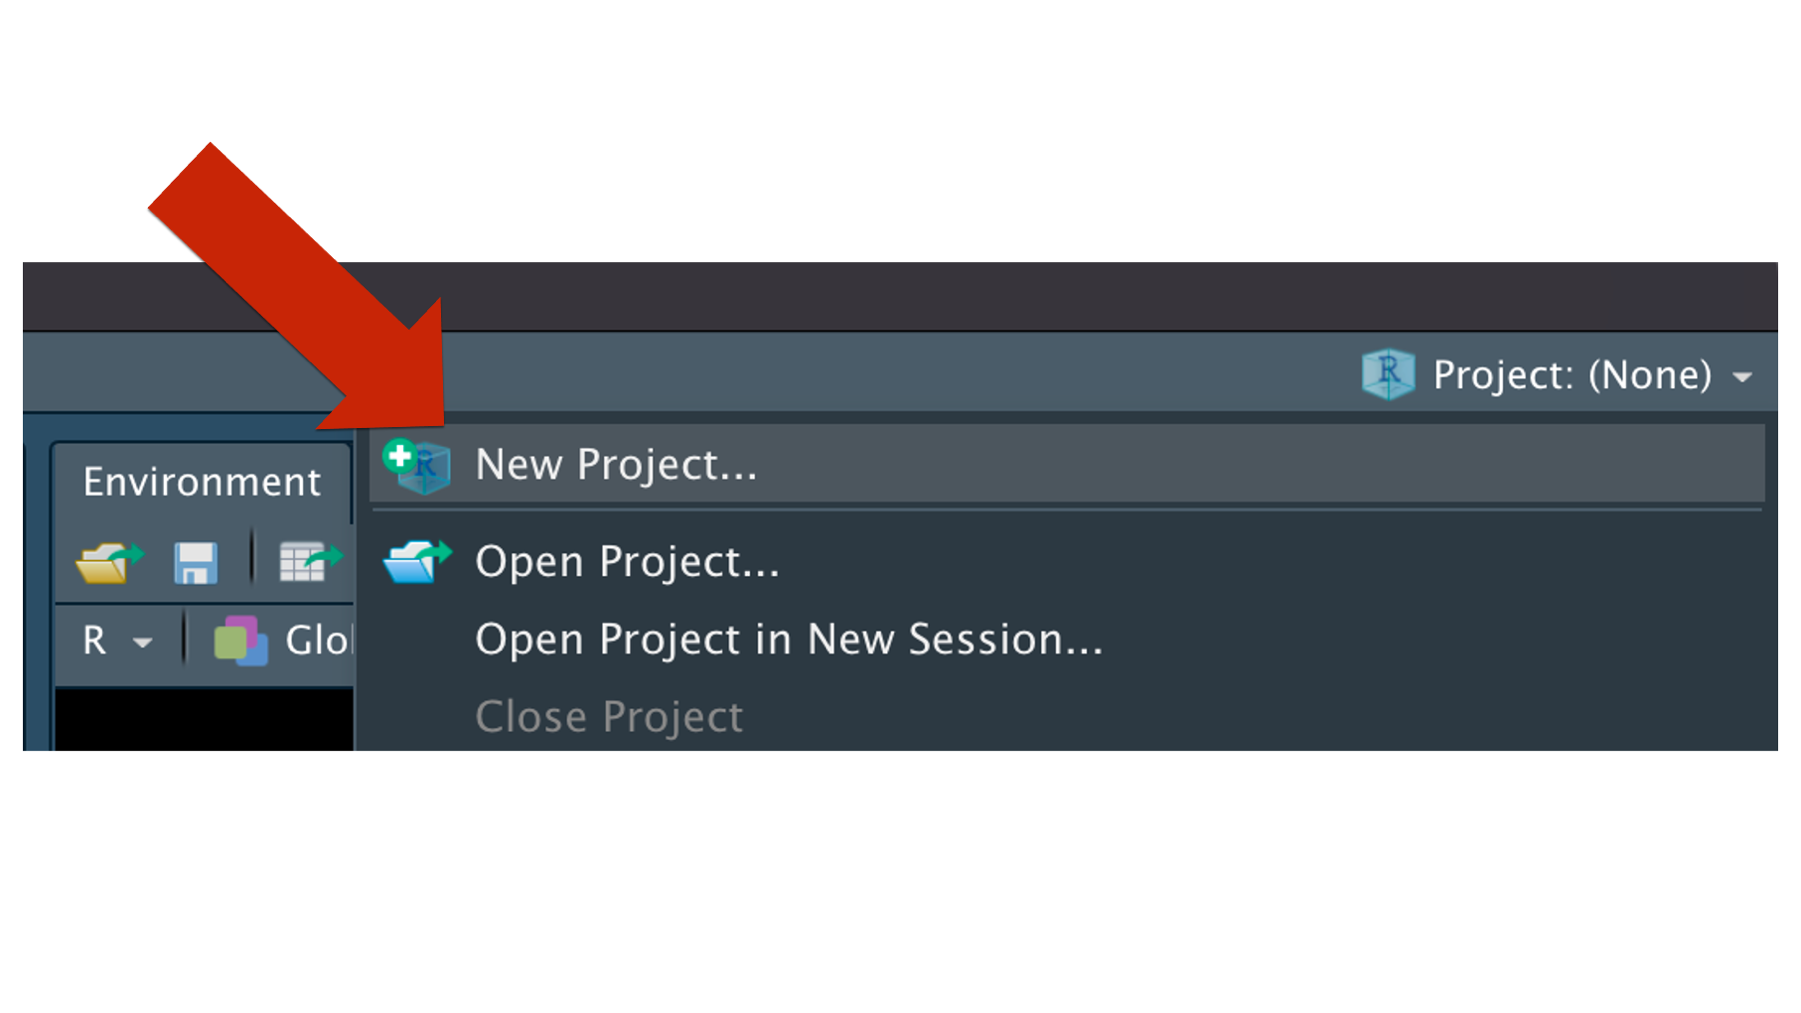
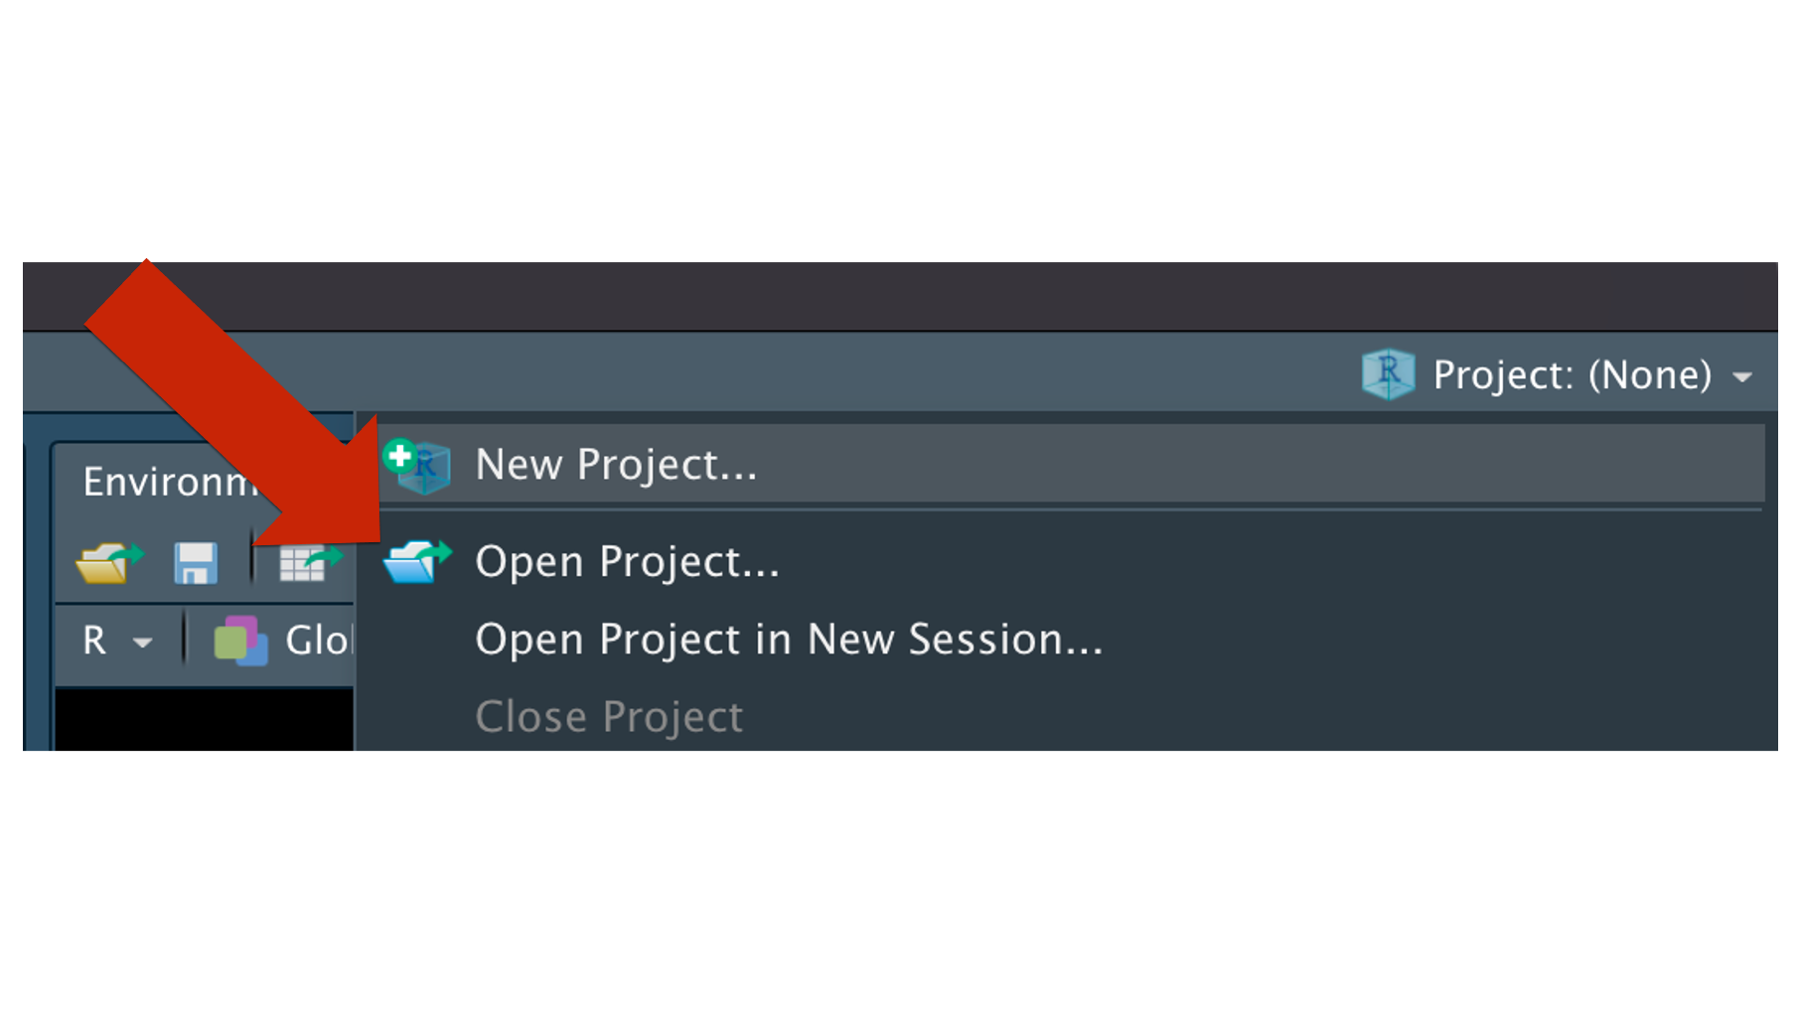
RStudio makes creating R projects really simple. For starters, let’s take a look at the top right corner of our RStudio application window. Currently, we see an R project icon that looks like little blue 3-dimensional box with an “R” in the middle. To the right of the R project icon, we see words Project: (None). RStudio is telling us that our current session is not associated with an R project.
![]()
To create a new R project, we just need to click the drop-down arrow next to the words Project: (None) to open the projects menu. Then, we will click the New Project... option.
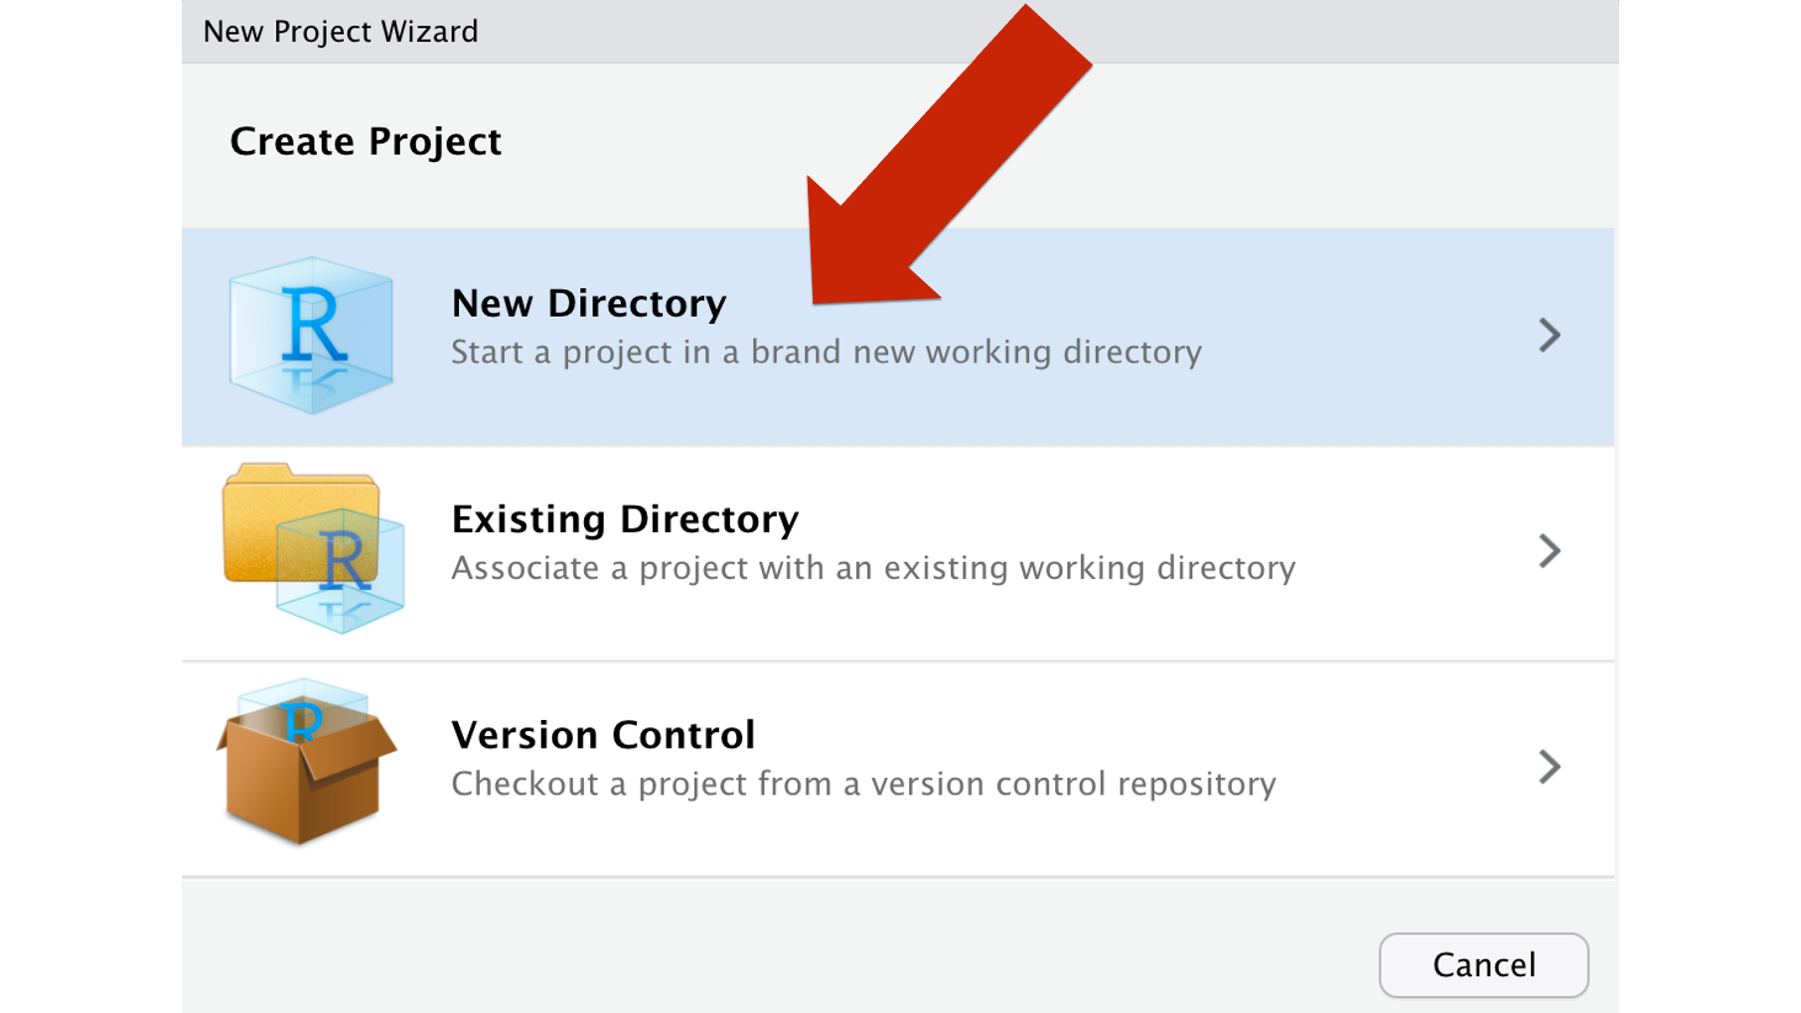
Doing so will open the new project wizard. For now, we will select the New Directory option. We will discuss the other options later in the book.
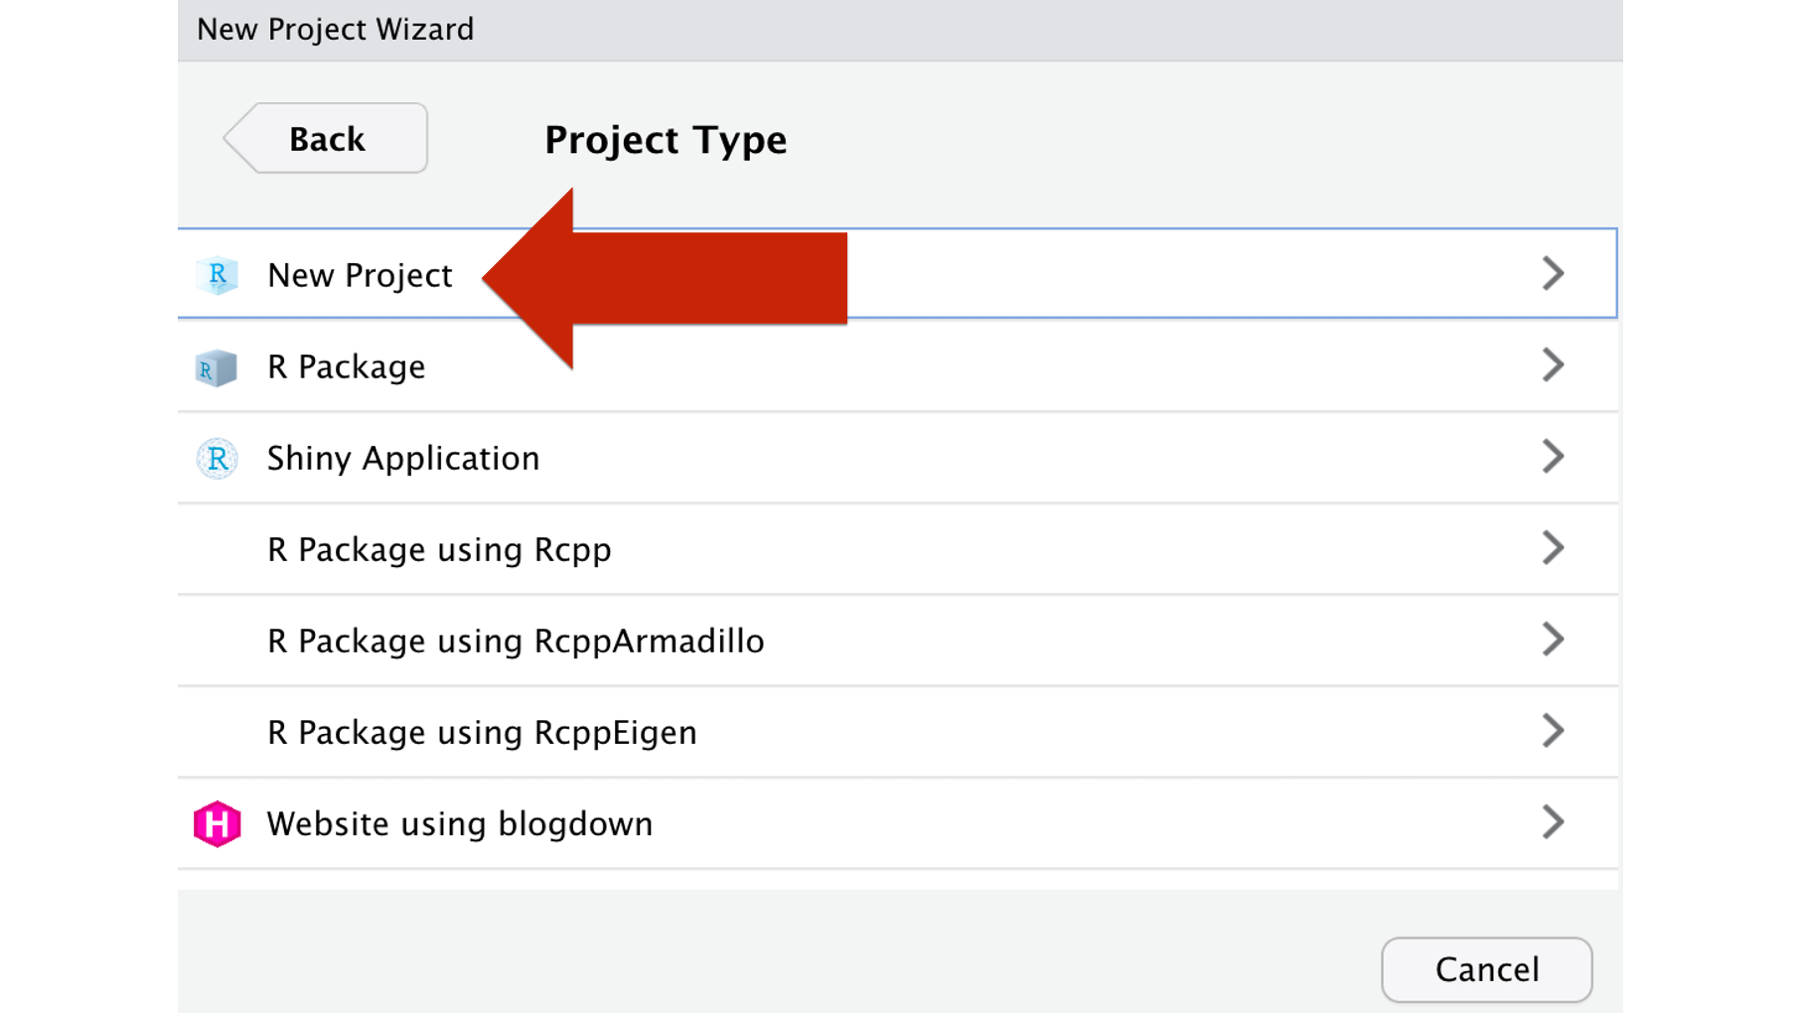
Next, we will click the New Project option.
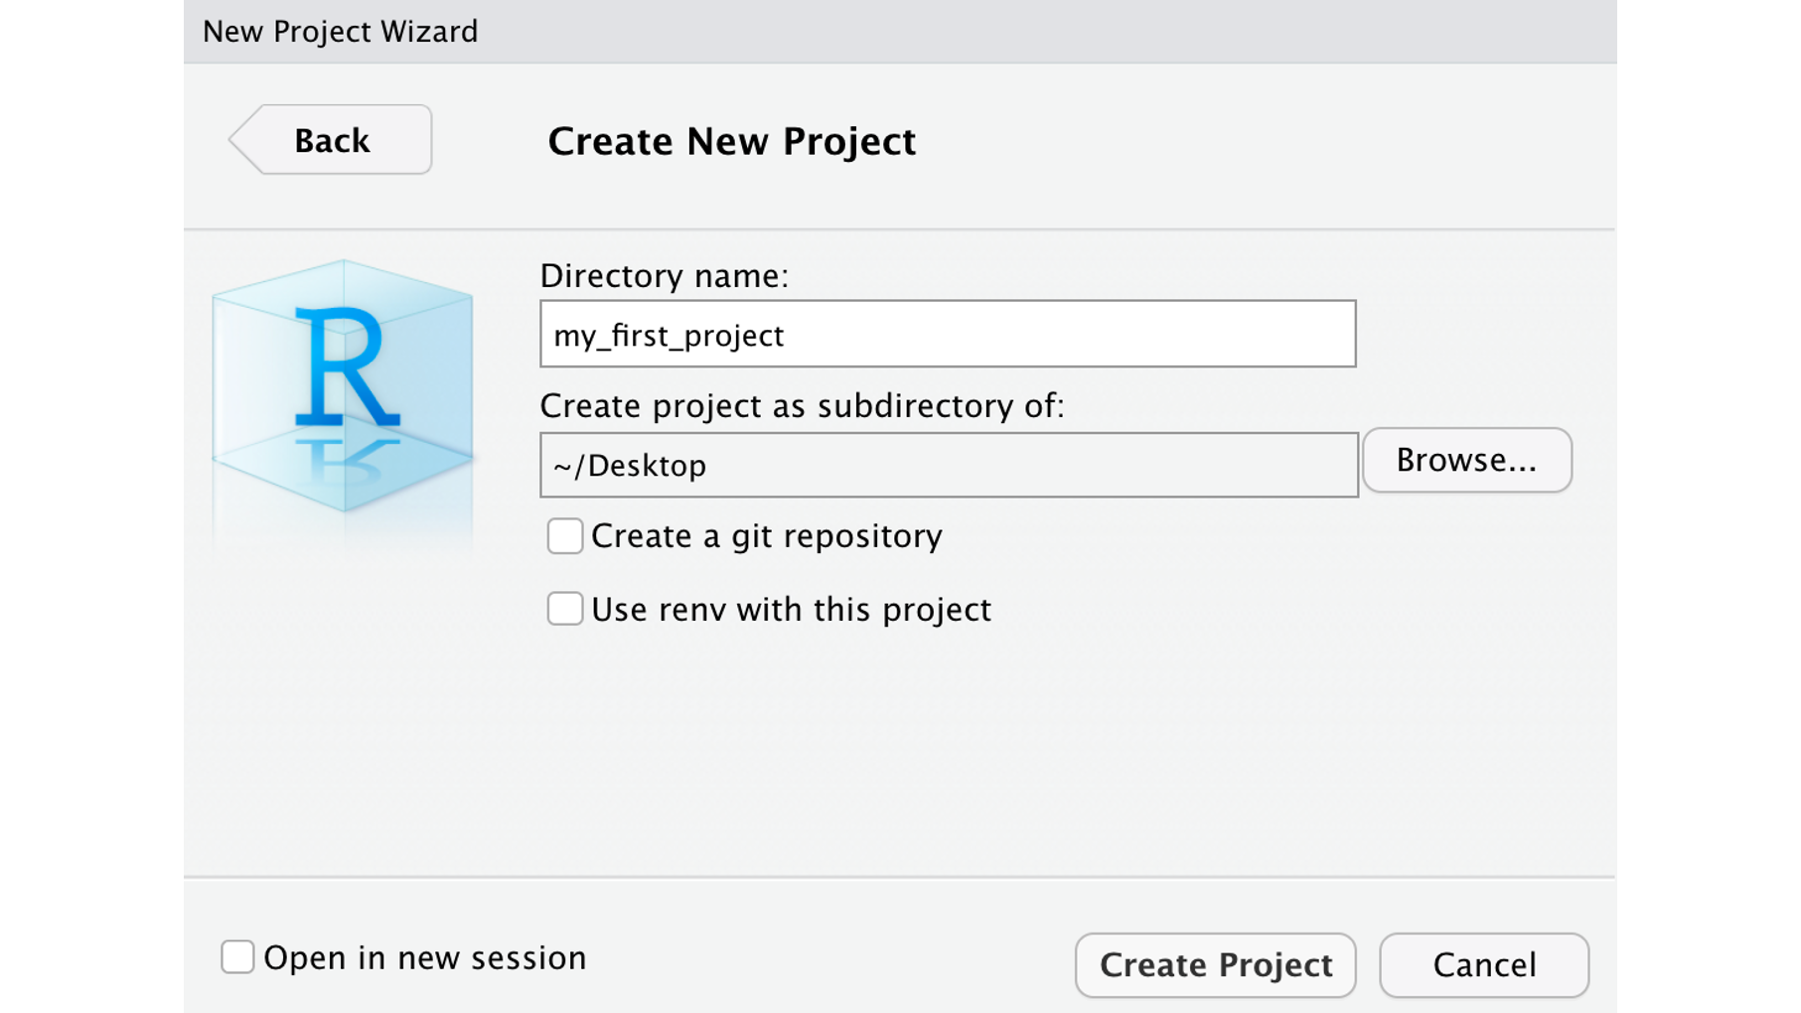
In the next window, we will have to make some choices and enter some information. The fist thing we will have to do is name our project. We do so by entering a value in the Directory name: box. Often, we can name our R project directory to match the name of the larger project we are working on in a pretty natural way. If not, the name we choose for our project directory should essentially follow the same guidelines that we use for object (variable) names, which we will learn about soon. In this example, we went with the very creative my_first_project project name.😆
When we create our R project in a moment, RStudio will create a folder on our computer where we can keep all of the files we need for our project. That folder will be named using the name we entered in the Directory name: box in the previous step. So, the next thing we need to do is tell R where on our computer to put the folder. We do so by clicking the Browse... button and selecting a location. For this example, we chose to create the project on our computer’s desktop.
Finally, we just click the Create Project button near the bottom-right corner of the New Project Wizard.
Doing so will create our new R project in the location we selected in the Create project as subdirectory of: text box in the new project wizard. In the screenshot below, we can see that a folder was created on our computer’s desktop called my_first_project. Additionally, there is one file inside of that folder named my_first_project that ends with the file extension .Rproj (see red arrow 2 in the figure below).
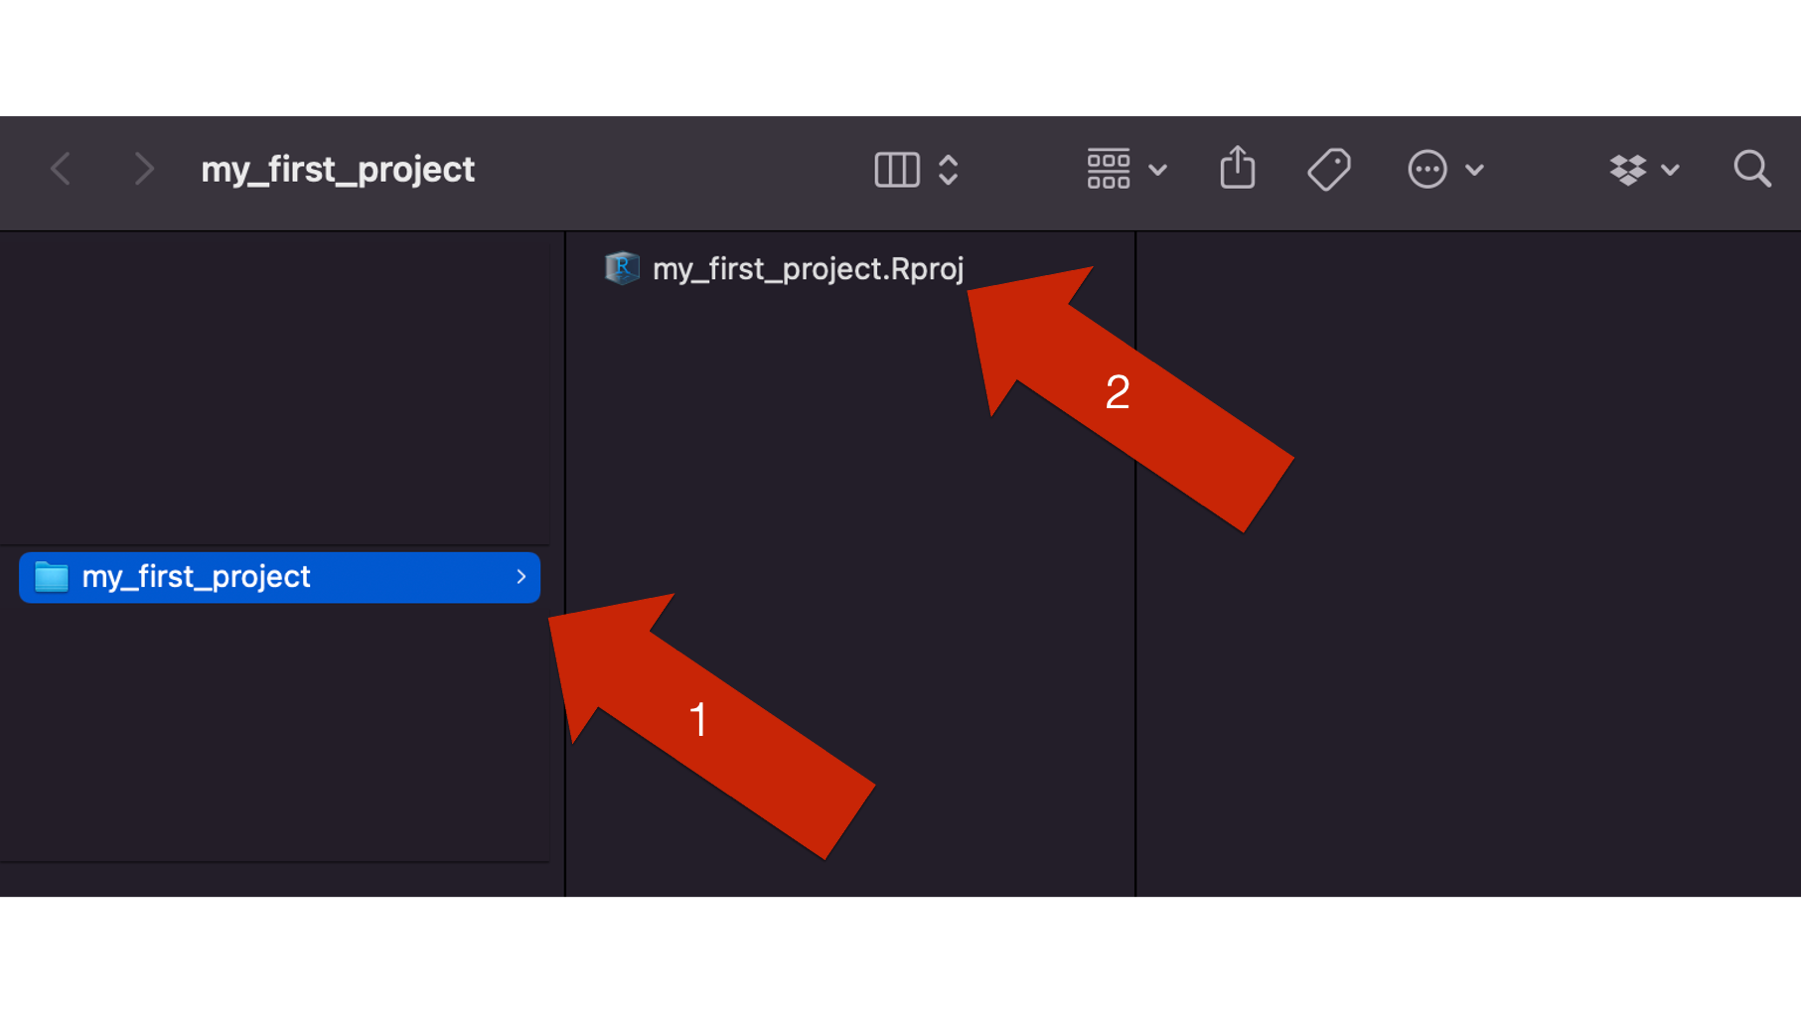
This file is called an R project file. Every time we create an R project, RStudio will create an R project file and add it to our project directory (i.e., the folder) for us. This file helps RStudio track and organize our R project.
To easiest way to open the R project we just created is to double click the R project file – my_first_project.Rproj. Doing so will open a new RStudio session along with all of the R code files we had open last time we were working on our R project. Because this is our first time opening our example R project, we won’t see any R code files.
Alternatively, we can open our R project by once again clicking the R project icon in the upper right corner of an open RStudio session and then clicking the Open Project... option. This will open a file selection window where we can select our R project directory and open it.
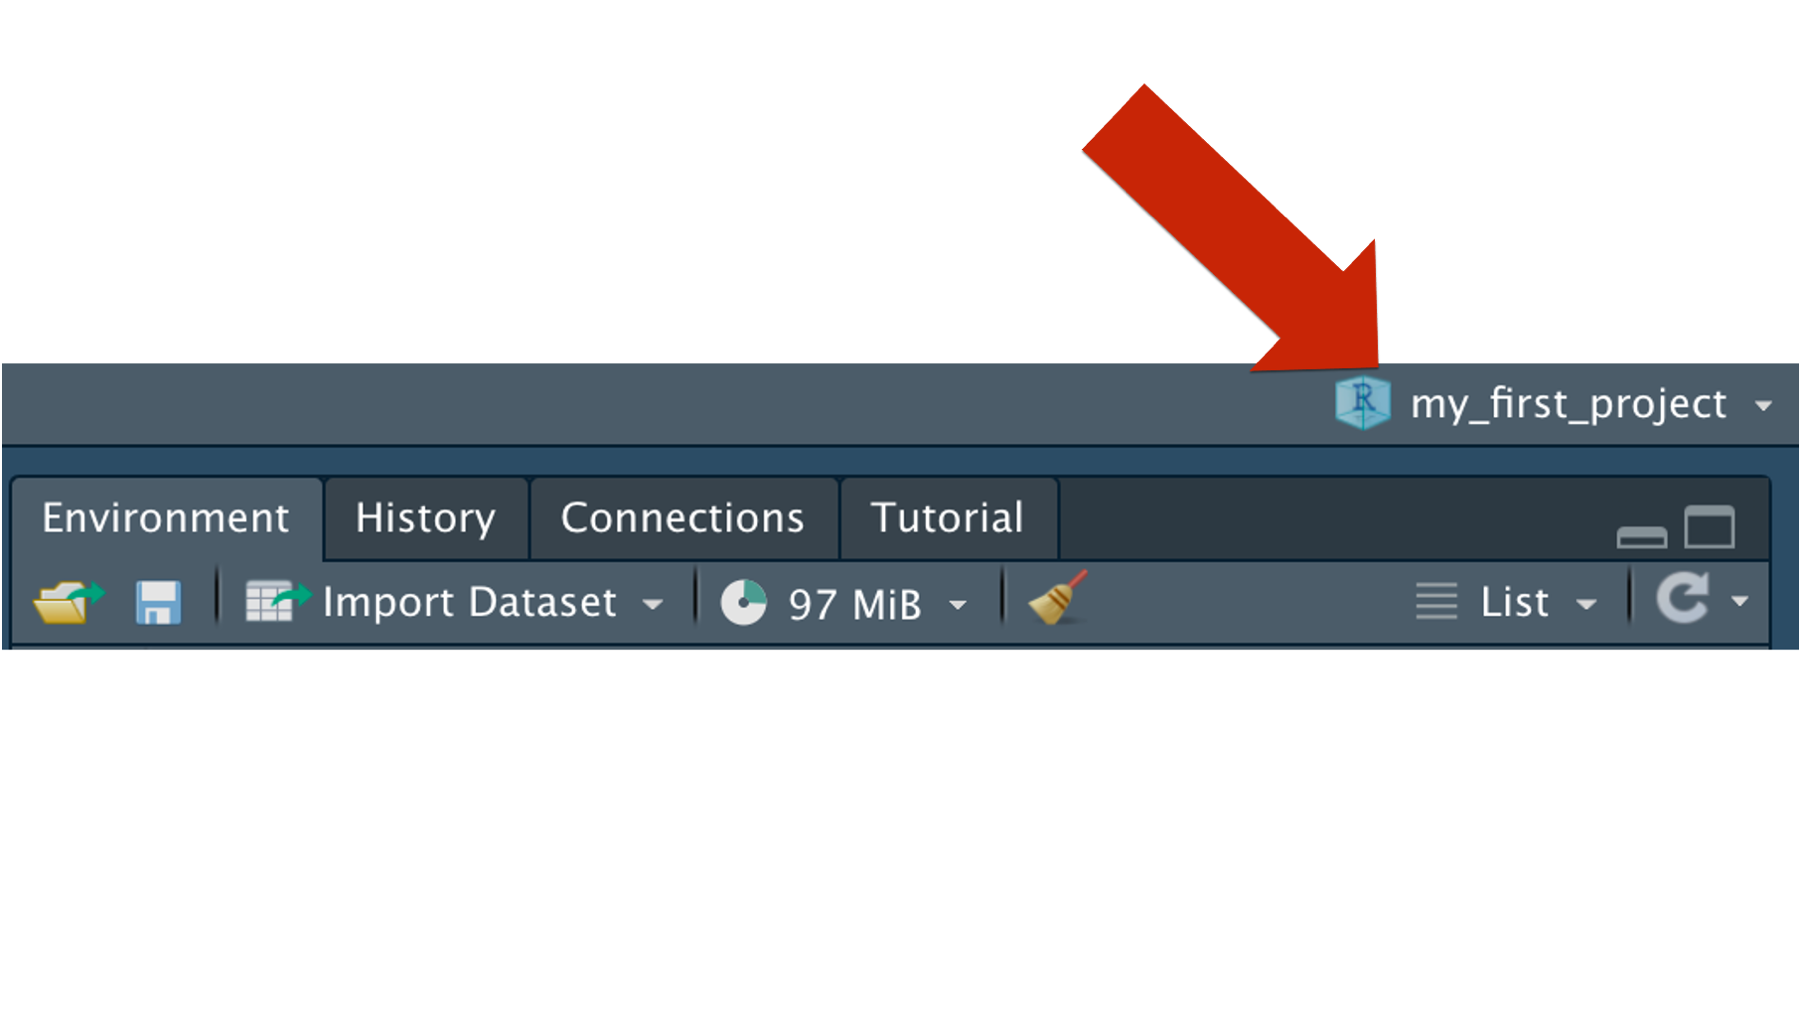
Finally, we will know that RStudio understands that we are working in the context of our project because the words Project: (None) that we previously saw in the top right corner of the RStudio window will be replaced with the project name. In this case, my_first_project.
Now that we’ve created our R project, there’s nothing special we need to do to add other files to it. We only need save files and folders for our project as we typically would. We just need to make sure that we save them in our project directory (i.e., the folder). RStudio will take care of the rest.
R projects are a great tool for organizing our R code and other complimentary files. Should we use them every single time we use R? Probably not. So, when should we use them? Well, the best – albeit somewhat unhelpful – answer is probably to use them whenever they are useful. However, at this point in your R journey you may not have enough experience to know when they will be useful and when they won’t. Therefore, we are going to suggest that create an R project for your project if (1) your project will have more than one file and/or (2) more than one person will be working on the R code in your project. As we alluded to earlier, organizing our files into R projects allows us to use relative file paths instead of absolute file paths, which will make it much easier for us to collaborate with others. File paths will be discussed in detail later.